Disclosure: This article contains affiliate links. If you buy through them, Vital Dwelling may earn a commission at no extra cost to you. It never changes our recommendations — every product below earned its place by solving a real problem in this job.
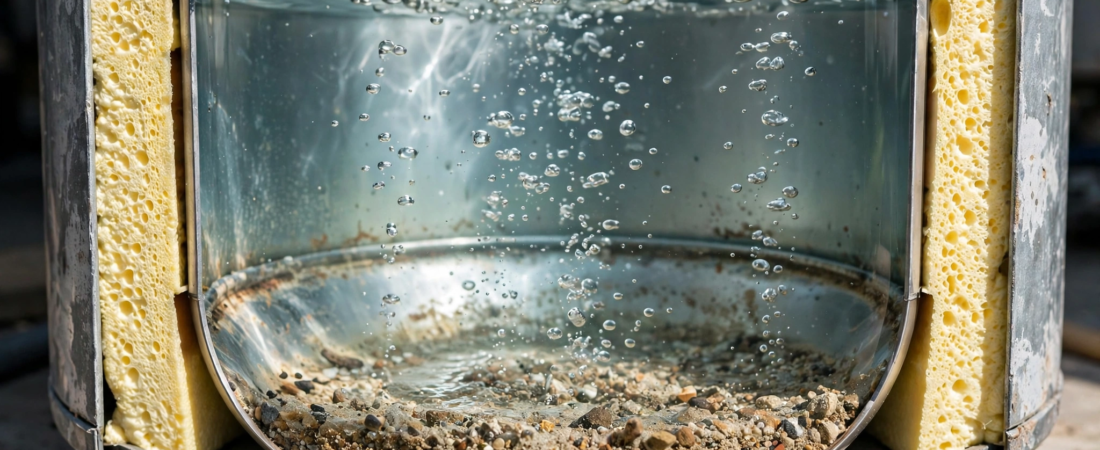
If your water heater rumbles, pops, or sounds like it’s boiling rocks, it is. That noise is sediment — sand, minerals, and flakes of scale that settle on the bottom of the tank and get cooked, day after day, by the burner or heating elements below them.
The fix is unglamorous, cheap, and takes about an hour once a year: flush the tank. Manufacturers recommend it annually, most homeowners never do it once, and that gap is exactly why so many water heaters die at year seven instead of year fifteen. This guide walks you through the whole job, step by step, with nothing more exotic than a garden hose.
Why flushing matters
Sediment is an insulator sitting in the worst possible place — between the heat source and the water. Your heater works harder and longer to push heat through it, which means:
- Higher energy bills for the same hot water
- Rumbling and popping as trapped water flashes to steam under the sediment layer
- Less hot water, because sediment takes up tank volume
- A shorter tank life — overheating at the bottom stresses the steel and the glass lining, and cracks in that lining are where rust begins
A yearly flush removes the sediment before it compacts into a layer you can no longer rinse out. It’s the single highest-value maintenance task on the appliance, and it’s why we put it on our Fall Home Maintenance Checklist — fall is the perfect time, right before the heater works its hardest all winter.
What you need
- A garden hose long enough to reach a floor drain, driveway, or yard
- A 5-gallon bucket (to inspect what comes out)
- Gloves — the water can be hot
- A flathead screwdriver (some drain valves need one)
- Optional but smart: a sediment flushing tool if your tank hasn’t been flushed in years (step 6)
That’s it. The basic flush costs nothing but an hour. The products in this guide solve specific problems — stubborn compacted sediment, a worn-out anode rod, a plastic drain valve that clogs — and each one is flagged where it belongs in the steps.
Safety first (read this before touching anything)
- Kill the power or gas. Electric heater: switch its breaker OFF at the panel. Gas heater: turn the control knob on the unit to PILOT.
- Respect the heat. A working tank holds water at 120–140°F, which scalds. Either let the water cool for a few hours first (running the hot tap helps), or wear gloves and treat every drop as hot.
- Never, ever re-energize an empty tank. Turning the power back on before the tank is completely full burns out electric elements in seconds. This is the one expensive mistake in this job — step 9 protects you from it.
How to flush a water heater, step by step
Step 1 — Cool the water down. Run hot water from a tub or sink faucet for several minutes, or simply wait a few hours after switching the heater off. Lukewarm is the goal.
Step 2 — Shut off the cold supply. Find the cold-water pipe entering the top of the heater and close its valve (usually a quarter-turn lever or a gate valve wheel).
Step 3 — Open a hot faucet somewhere in the house. Leave it open for the whole drain. This lets air in so the tank drains smoothly instead of glugging and vacuum-locking.
Step 4 — Connect the hose to the drain valve. The drain valve sits near the bottom of the tank and looks like a small hose spigot. Thread the garden hose onto it, and run the other end to a floor drain, outside, or into your bucket if you want to inspect the sediment (you do — step 7 is the interesting part).
Step 5 — Open the drain valve and let it empty. Open the valve fully. Water will run cloudy, rusty, or full of white and tan grit at first. A full 40–50 gallon tank takes roughly 10–20 minutes to drain by gravity.
Step 6 — Pulse-flush until the water runs clear. With the drain valve still open, turn the cold supply back on in short 20–30 second bursts. Each burst stirs the bottom of the tank and pushes another wave of sediment out the hose. Repeat until the water coming out is completely clear and grit-free.
If the sediment won’t move: on tanks that haven’t been flushed in years, the bottom layer can be so compacted that gravity and pulsing barely touch it — and sometimes the drain valve itself clogs. This is the problem the Sediment Buster was built for: it threads onto the drain valve and uses bursts of air from a bicycle pump or small compressor to agitate the sediment loose while the tank drains, with a clear window so you can watch the grit leave. If your heater is rumbling loudly, start with this — it’s far cheaper than the alternative.
Step 7 — Read your sediment. What lands in the bucket tells you about the tank. White or tan flakes and sand = normal mineral buildup, now gone. A lot of rust-colored water = corrosion is underway inside, which leads straight to the next step.
Step 8 — While it’s drained: check the anode rod. The anode rod is a sacrificial metal rod inside the tank that corrodes instead of your tank walls. When it’s used up — eaten down to a thin wire — the tank itself starts rusting, and that’s fatal. Manufacturers suggest checking it every couple of years, and a flush is the perfect moment: with the tank empty, the rod (a large hex head on top of the unit) can be loosened with a 1-1/16″ socket and pulled out for inspection.
- Rod mostly intact with surface pitting? It can go back in.
- Rod worn to the steel core wire, or coated in crusty calcium? Replace it.
For low ceilings where a rigid 44-inch rod can’t come out, a flexible magnesium anode rod kit bends in segments and includes the socket and Teflon tape in the box. And if your hot water has ever had a rotten-egg (sulfur) smell — or you simply never want to do this job again — a powered titanium anode rod replaces the sacrificial rod permanently, stops the odor within about a day, and carries a 20-year warranty.
A note on the drain valve itself: many tanks ship with a cheap plastic drain valve that clogs on the very sediment you’re trying to remove, drips forever after, or snaps off in your hand. If yours misbehaves, replacing it with a brass full-port drain valve is a 10-minute job while the tank is empty — the full-bore opening drains faster, clears grit instead of trapping it, and will outlive the heater.
Step 9 — Refill the right way. Close the drain valve and remove the hose. Leave the hot faucet in the house open, and open the cold supply. The tank is full when water flows steadily (not sputtering) from that open faucet — now close the faucet. Only then restore power at the breaker, or turn the gas control back to your temperature setting. This order guarantees the tank is completely full before any heat is applied.
How often should you flush a water heater?
- Once a year for most homes — this is what manufacturers recommend.
- Twice a year if you have hard water, a well, or a water softener (softened water can be harder on anode rods).
- Right now if you’ve never done it, whatever month it is. Then put it on an annual rhythm.
Our free printable Water Heater Maintenance Log & Flush Checklist has a log page for the flush date and anode checks, so the answer to “when did I last do that?” is never a guess again.
Signs you’ve waited too long
- Rumbling, popping, or crackling from the tank
- Hot water that runs out noticeably faster than it used to
- Rusty or gritty hot water (but clear cold water)
- Water that isn’t as hot at the same setting
- A heater older than 6–8 years that’s never been flushed
DIY vs. calling a plumber
Doing it yourself costs the price of a garden hose you already own — call it $0, or about $45 if you add the Sediment Buster for a neglected tank. A plumber’s flush visit often runs $150–300 depending on your area. The honest exceptions where you should call one: a drain valve that won’t budge or breaks off, any gas smell, a leaking tank (a leaking tank is a replacement, not a repair), or a T&P relief valve that’s corroded or weeping.
FAQ
How long does it take to flush a water heater?
About an hour, most of it waiting for the tank to drain and refill. The active work is maybe 15 minutes.
Can I flush a water heater without draining it completely?
A partial “mini-flush” (draining a few gallons from the valve) is better than nothing, but the full drain-and-pulse method above is what actually clears the bottom of the tank.
What if nothing comes out when I open the drain valve?
Sediment has likely clogged the valve. Don’t force it. Short cold-water pulses can clear it; an air-powered flushing tool is designed for exactly this. If it stays blocked, that’s a plumber visit — forcing a plastic valve can snap it.
Does flushing help a tankless water heater?
Tankless units need a different job — descaling with a pump and solution through their service valves. This guide covers tank-style heaters, which are still the majority in US homes.
My water smells like rotten eggs. Will flushing fix it?
Probably not on its own — that smell usually comes from bacteria reacting with the anode rod. Flushing helps, but the lasting fix is replacing the rod, ideally with a powered anode rod made for the problem.
What temperature should I set after refilling?
120°F is the standard recommendation — hot enough for comfort and hygiene, low enough to reduce scald risk and slow mineral buildup.
The bottom line
An hour, a hose, once a year. That’s the whole secret to a water heater that stays quiet, efficient, and alive well past its warranty. Do the flush this fall, check the anode rod while you’re in there, and log it on the printable checklist. And if this guide helped, our Essential Tools for New Homeowners will round out the rest of your maintenance kit — and if a toilet in the house won’t stop running, that fix is a one-hour job too.